Create Application user in Azure for use in Dynamics 365
When using multifactor authentication for your Dynamics 365, it tends to cause issues with the KingswaySoft connector, as MFA is not supported by their toolkit. Therefore – as an alternative to disabling the MFA – you can switch to OAuth authentication in the KingswaySoft connection manager and connect with a Azure Application user, and I will attempt to guide you, how to set it up.
*Disclaimer*
This is a step-by-step I used to get it working – I cannot guarantee it will work for you. If you experience issues, feel free to get in touch, and we can see if we can figure it out.
Step 1:
Log into the Azure portal (https://portal.azure.com)
Step 2:
Navigate to Azure Active Directory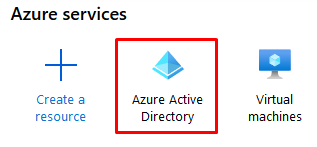
Step 3:
Select App Registrations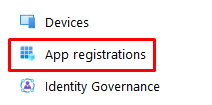
Step 4:
Select New registration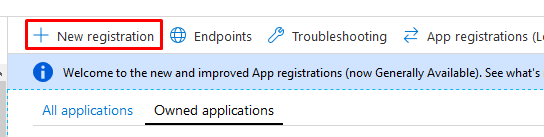
Step 5:
When creating the new registration, you just need to fill in a temporary name and a optional URL – I usually fill in the Redirect URL with https://login.microsoftonline.com as a valid URL
Step 6:
When the new registration as been created, navigate to API permissions
Step 7:
In the API permissions, click on Add a permission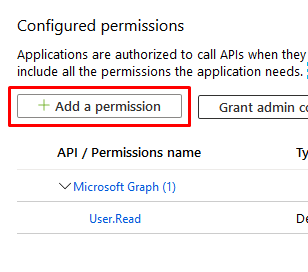
Step 8:
A new window will open, and in the tab called Microsoft APIs, select Dynamics CRM.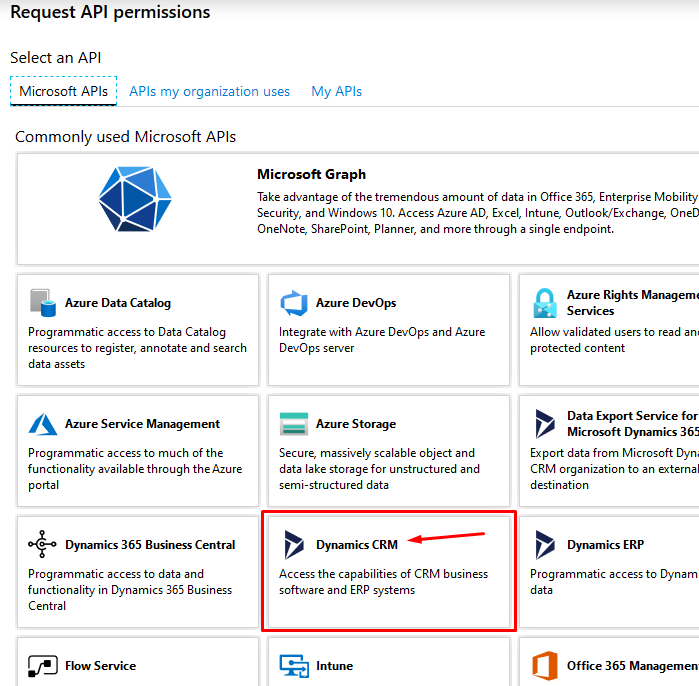
Step 9:
Select the user_impersonation, and click on Add permissions
Step 10:
When you added the permission, navigate to Certificates & Secrets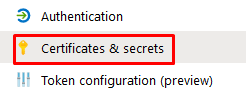
Step 11:
Click on New client secret, and give it a description and a expiration. I usually just call it Dynamics365 and Never expire.
Step 12:
When you create the Secret, make sure you copy the value into a notepad, as you will not be able to copy it later.
Step 13:
Last thing to do before you are done here, is to copy the application ID for the new Application Key you made. Just copy that into the same notepad as the Secret.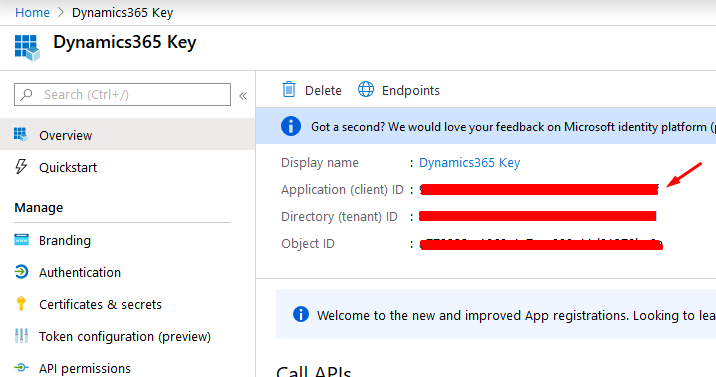
We are now done in the Azure portal, and you can proceed into CRM for the new steps.
Step 14:
We need to add a new application user in CRM, so when you are logged into Dynamics365, navigate to Settings, Security, Users
Step 15:
In the User section, select the system view called Application Users. This is important, as this is where we get access to create a new user. Click NEW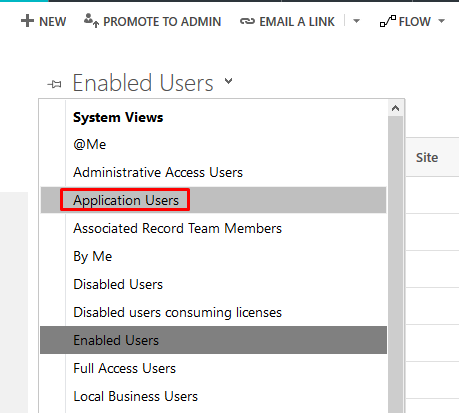
Step 15:
Fill the fields on the form, and copy the Application ID from your notepad into the field. When you have saved your application user, make sure to give it the appropriate security roles (fx System administrator).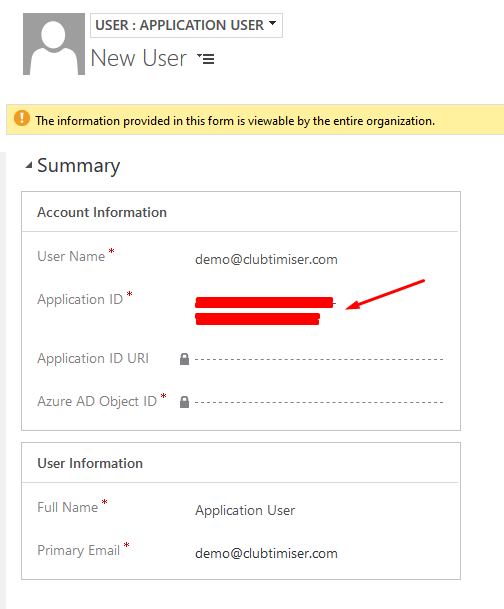
Step 16:
With the User created in Dynamics365, we can now select and use the application user in KingswaySoft. Open Visual Studio, and create a new KingswaySoft connection manager, in the desired DTSX file.
Step 17:
Select the Authentication type OAuth, and then select the OAuth type Client Credentials.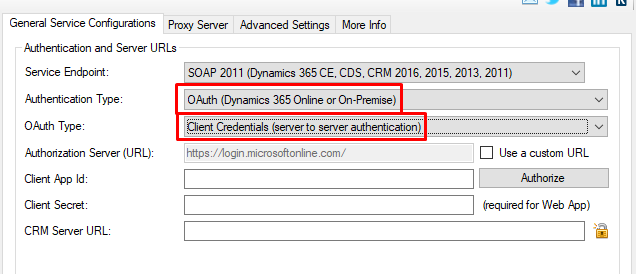
Step 18:
Copy the application Id into the Client App Id field, and the Secret Id in the Client Secret field.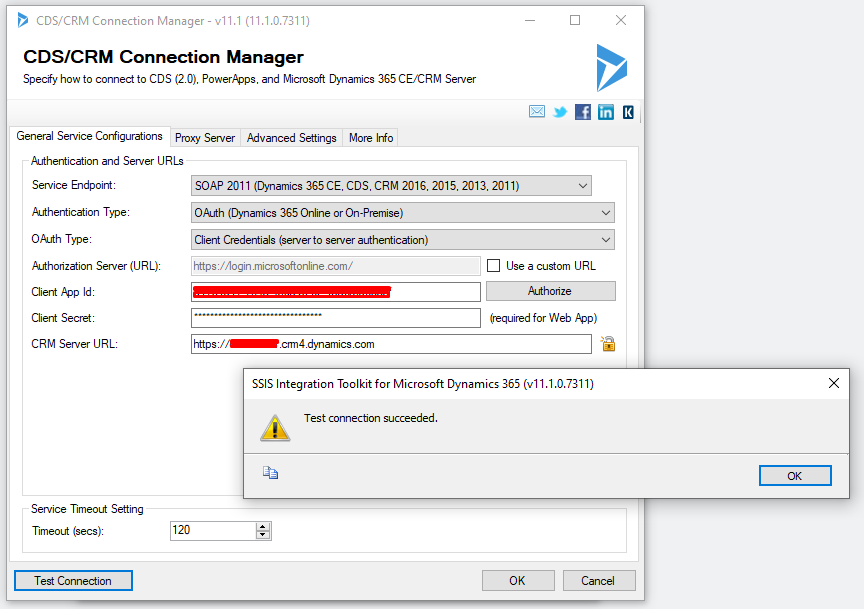
Step 19:
You also need to Authorize the client ID – in order to do that, click the Authorize button in the Connection Manager. You will be shown a popup, where you need to enter a URL. You can enter https://login.microsoftonline.com, and click Authorize in Browser.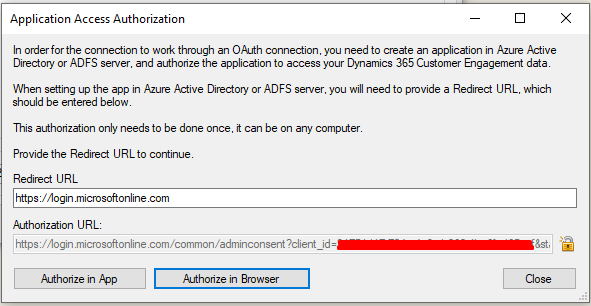
This opens a new window, where you need to authorize the use of the client application.
Step 20:
When that is completed – you are done. You can use the connection manager to fetch data in CRM.