Extract data from Azure Data Lake CDM with KingswaySoft
This dataflow requires the KingswaySoft Productivity Pack, to get the CDM Source component. For this brief run through, I will use VS2019 and KingswaySoft ProductivityPack v22.1.
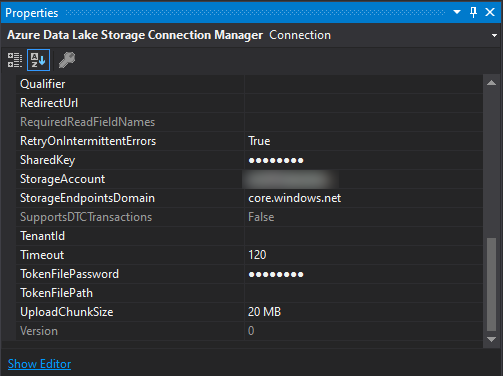
Connection Manager
The connection to the Data Lake needs to be made with the Azure Data Lake Storage Connection Manager from KingswaySoft, where I used the Shared Key authentication. For more info on the other authentication methods, you can visit the FAQ page on their website.

There are scenarios where the connection can be forcibly closed by external host, and in this case, increasing the timeout can help. The max for this is default 1200 sec for the component, but this can be overwritten, by selecting the Connection Manager in the Connections window, going to the Properties pane, and inputting your own timeout value.
Source Component
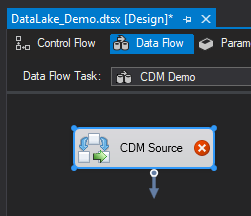
Now we need to create a new Data Flow Task and add a CDM Source component to that Data Flow.
In the source, we need to specify the following:
- Connection Manager
- Manifest Folder Path
- Manifest Type
- Default manifest
- Source Object
- Partition
Connection Manager
This is straight forward – just apply the connection manager you made for the Azure Data Lake Storage Connection Manager.
Specific CDM fields
This is a lookup field, where you can browse your Data Lake folders. CDM are not structured in the same way as tables, but rather in partitioned CSV files. Each individual CSV files JUST contains data – no metadata or headers – just data. The Metadata and headers are stored in CDM.JSON files separately from the data files, and the CDM uses the manifest files, to connection the metadata to the raw data. So, for the Manifest folder path, we need to locate the FOLDER, where the manifest is located.
For my example where, I would need to extract data from the table called InventTable. For this specific table, the datafile is located on this path:
“Tables/SupplyChain/ProductInformationManagement/Main/InventTable/”, and the manifest is located in the “Main” folder. The manifestfile is then called “Main.manifest.cdm.json”.
With that info, we can input all of the information needed in the Source. We do need to do some slight modifications, though. The Manifest type can either be Model or Manifest. For my demo, I am using the Manifest. When selecting Manifest, the Source automatically suggest a Manifest file location, end calls it “Default.manifest.cdm.json” – this is incorrect, and needs to be overwritten. To do that, click the small padlock next to the field, and lock the Browse button. Select the correct manifest file.
In the Source Object, this is a dropdown of all the available objects in the folder (manifest). This is where we specify, that it’s the InventTable we need to extract. The partition defaults to <All>. This is usually the correct value, but it is possible to select a specific partition, in cases where the data quantity is split into multiple partitions. <All> merged all the partitions into one flow.
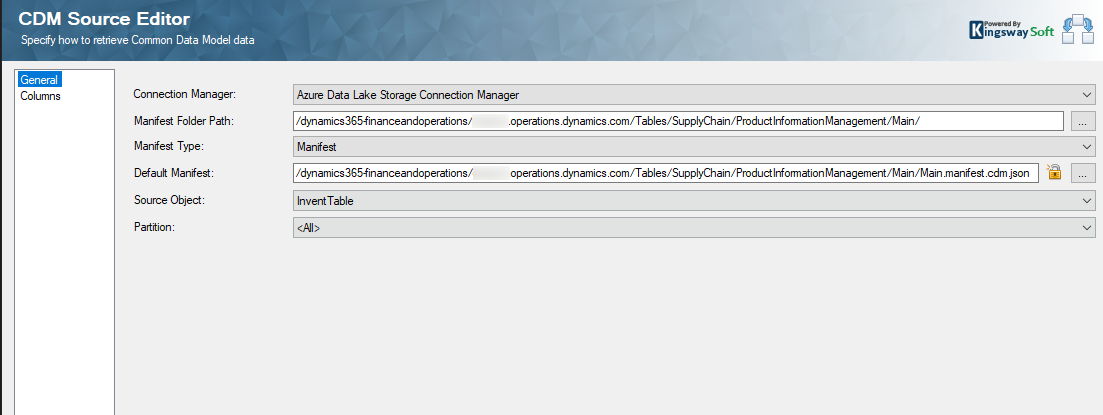
Click OK.
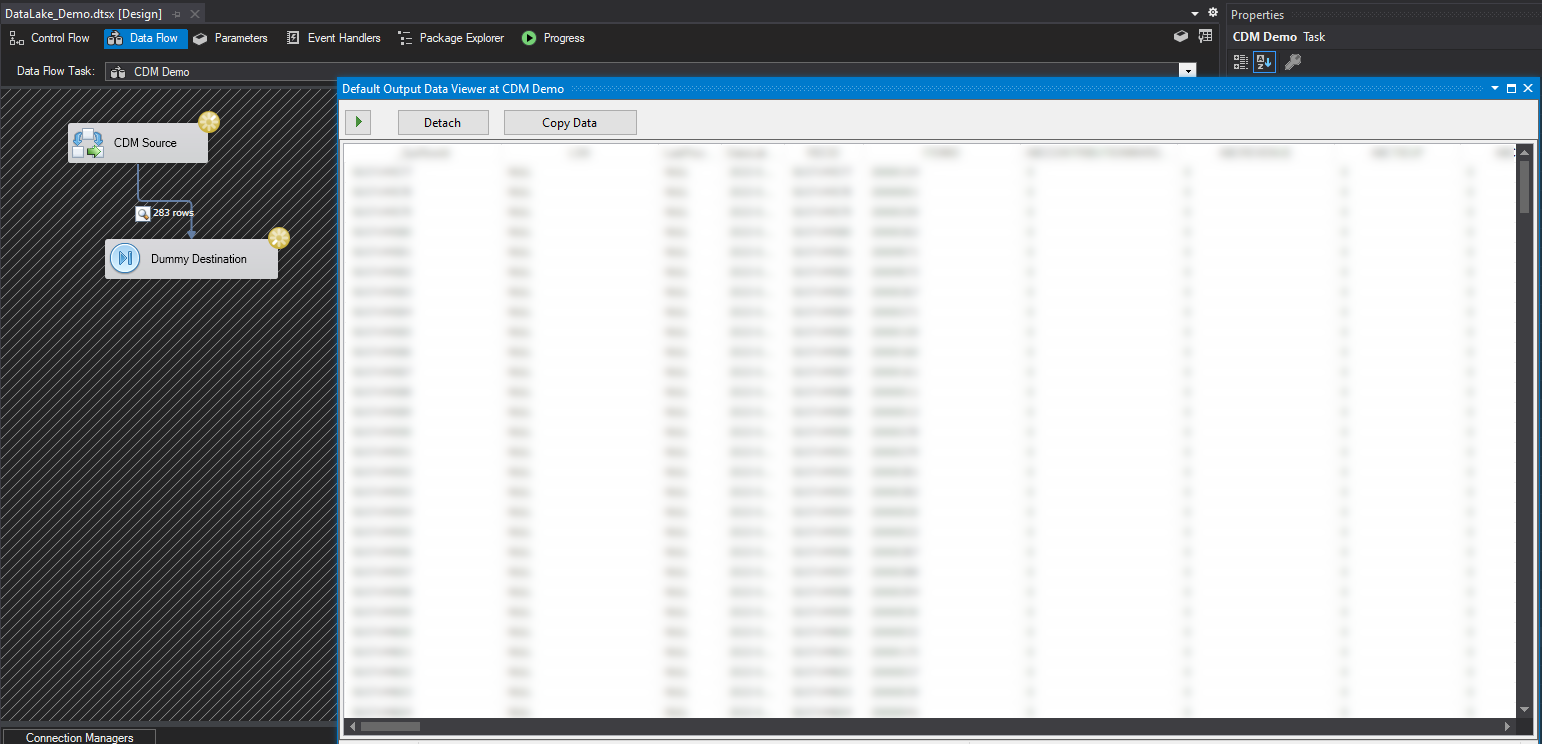
This is all you need to extract data from the Data Lake. The output from the source, can be routed to wherever you want. As an overview of the data, you can add a Dummy Destination (also a Productivity Pack component) and a data viewer to see the data.
Using Expressions
Instead of browsing the files in the data lake, it is possible to use Expressions instead. To do this, we need to apply the path to the data files in a variable, and then derive the rest of the strings from that – using some funky string-gymnastics.
We we have our starting point: the file path. I will just call the variable FullPath. Instead of describing each of the variables, I will type down a list of the variables I made, and their individual expressions. They need to be created in a specific order, as they are depend on eachother. I modified the path slightly, where I replaced the organisation name with stars. Simply replace those, and everything should work.
- FullPath
- Type: String
- Expression: ********.operations.dynamics.com/Tables/SupplyChain/ProductInformationManagement/Main/InventTable/
- Manifest_Filename
- Type: String
- Expression: RIGHT(LEFT(@[User::FullPath],LEN(@[User::FullPath])-(FINDSTRING(REVERSE(@[User::FullPath]),”/”,2))),FINDSTRING(REVERSE(LEFT(@[User::FullPath],LEN(@[User::FullPath])-(FINDSTRING(REVERSE(@[User::FullPath]),”/”,2)))),”/”,1)-1) + “.manifest.cdm.json”
- EndFolderName
- Type: String
- Expression: REPLACE(RIGHT(@[User::FullPath],FINDSTRING(REVERSE(@[User::FullPath]),”/”,2)),”/”,””)
- FolderPath
- Type: String
- Expression: “/dynamics365-financeandoperations/” + LEFT(@[User::FullPath],FINDSTRING(@[User::FullPath],”/”,2)-1)
- FolderEndPath
- Type: String
- Expression: REPLACE(REVERSE(SUBSTRING(REVERSE(@[User::FullPath]),FINDSTRING(REVERSE(@[User::FullPath]),”/”,2),LEN(@[User::FullPath]))),”********.operations.dynamics.com/Tables”,””)
- ManifestFolderPath
- Type: String
- Expression: @[User::FolderPath] + @[User::FolderEndPath]
- ManifestPath
- Type: String
- Expression: @[User::FolderPath] + @[User::FolderEndPath] + @[User::Manifest_Filename]
The above listed variables should give you the following results:

When you have made the variables, you can map them in the CDM Source using the Expression interface.
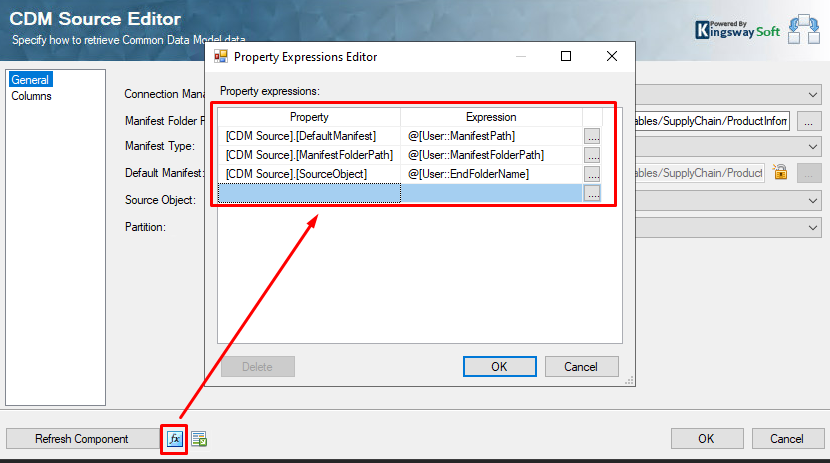
Using those variables, you only have to change the FullPath variable, and everything else changes to the correct values. The only thing you need to do, after you changed the FullPath variable, is to click on Refresh Component inside the CDM Source. This updates the meta data to match the new data source.